TomTom Rider 2 Docking Station Fuse Repair
The internal fuse of the docking station protects the Rider 2, but it is a pain to repair. But for those of you with the skills, here is how to do it. With the Rider 2 now discontinued, it has/will become harder and harder to buy a new docking station. Plus they are expensive. Here is the way to repair the docking station yourself.
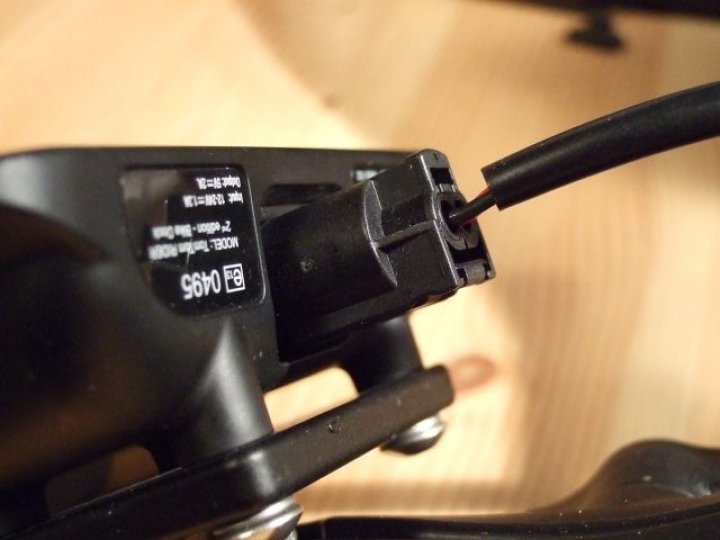
SPECIAL NOTE: Most common way the fuse is blown? Connecting the power source incorrectly, either plugging in the power line improperly at the dock or reversing the positive and negative wires when hard wiring to your battery or switchable power source on your motorcycle.
To protect the docking station (and avoid a costly repair) use an inline fuse with a rating of less then 2 amps. I have seen other people talk about using a 5 amp inline fuse. WHAT THE HECK !! You are allowing a power surge or short to create a situation where you are passing more amps to the docking station then it is intended to handle and you could blow the internal fuse. 1.5A to 1.6A are good choices.
SUPER SPECIAL NOTE: IF SOMEONE IS AWARE OF TOOL FOR REMOVING THE AXLES ON THIS DEVICE, PLEASE LET ME KNOW BY EMAILING ME PLEASE AND I WILL CHANGE THESE INSTRUCTIONS: knarfoh@knarfoh.com Please put DOCKING STATION in SUBJECT LINE
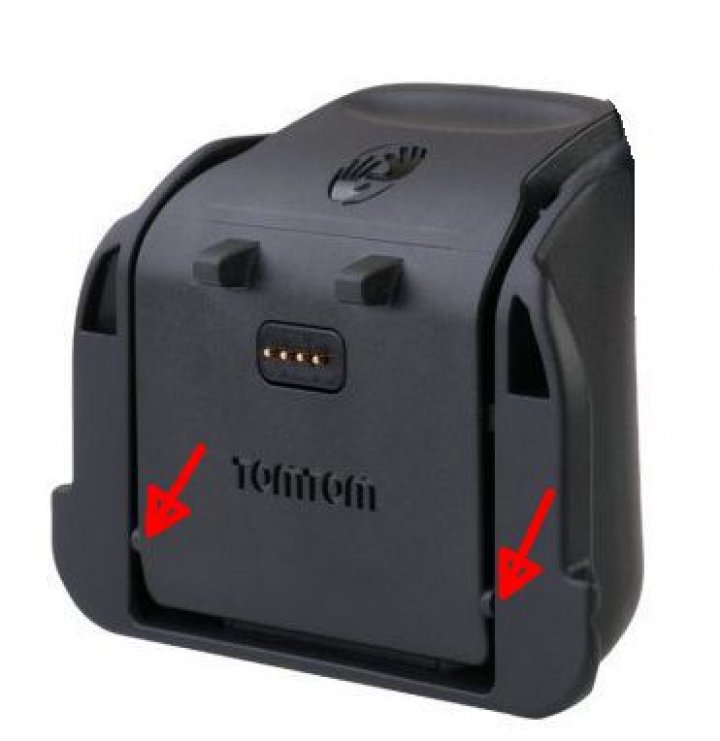
Remove the pivots (or axles). But you can't remove from the front.
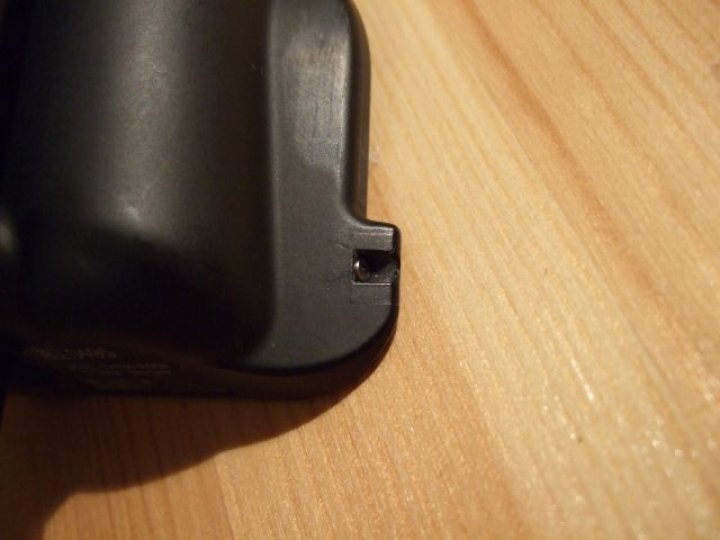
Backside image of the pivots (or axles) - But you cannot remove from the back.
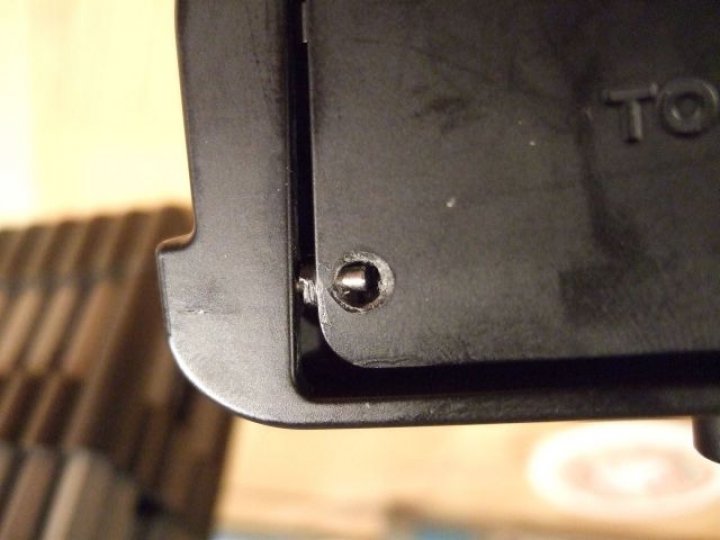
Using a fine tipped soldering iron - create an opening so you push the pins out of the way.
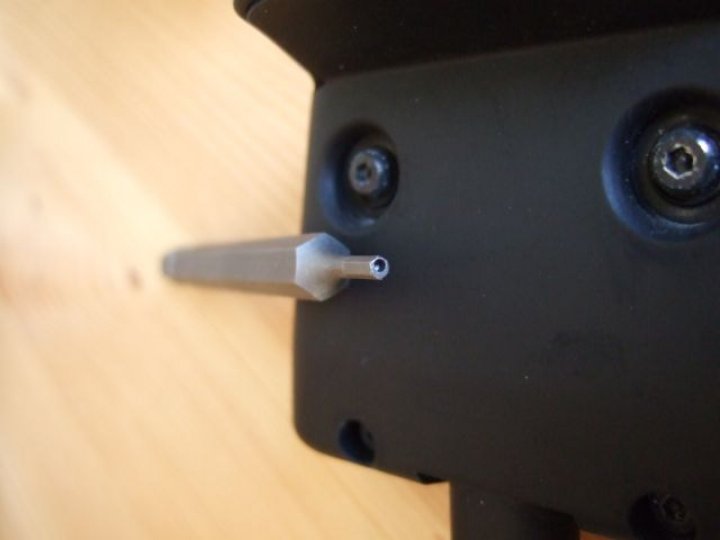
Use a 2mm security hex bit to remove the screws. The screws have dimples that prevent an ordinary 2mm hex bit from working properly
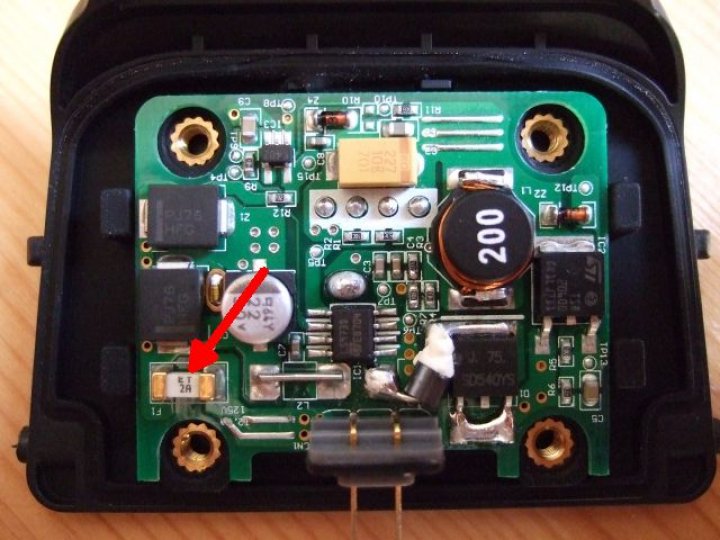
Location of the 2amp fuse on the docking station. Google the following to find sources of new fuses on the internet: SMD fuse (2A)
Available retailers will vary based upon location, i.e. Europe versus USA/Canada.
Instead of removing the old fuse, you can solder the new fuse in place by piggy backing it onto the old fuse. This will minimize the possibility of damaging the board. Or you can remove the old fuse and fuse directly to the board if you are brave.
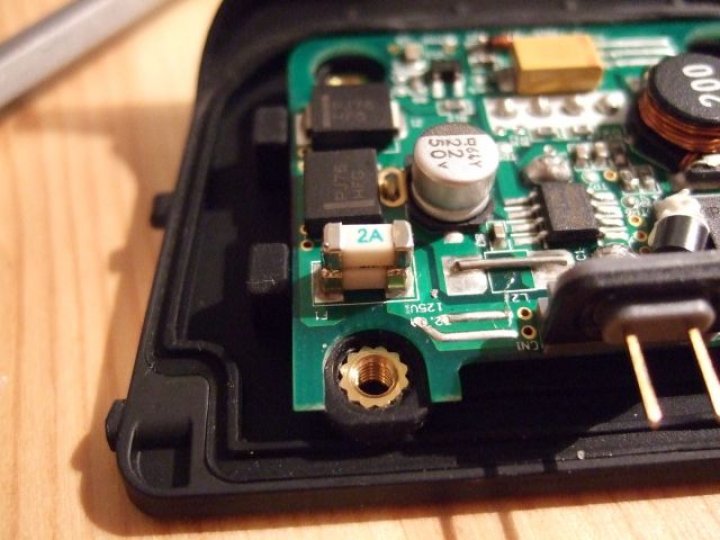
New fuse soldered in place - piggyback style
If you want to tinker with the contact pins, the panel is glued in using silicone and can also be removed.

PHOTOS COURTESY OF KARL H.